Photoshop�ϳ��L����������L�i¹��Ӣ��(3)
����Դ�� Tutsplus.com�����x���� Jenny Le �o�҂����������ʵ����£�Step 7
To make a shadow for the giraffe, create a new layer below the giraffe one. Hold Control and click the thumbnail of the giraffe layer to load its selection.
Fill this selection with the color #070101 and flip it vertically (Edit > Transform > Flip Vertical). Use Control-T with the Warp mode to distort the shadow to fit the direction of the light source.
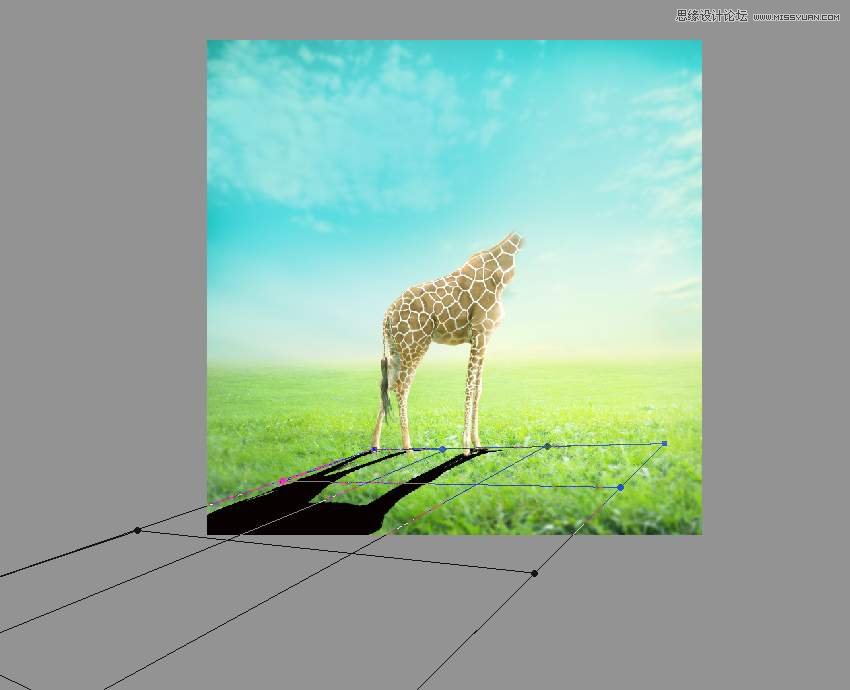
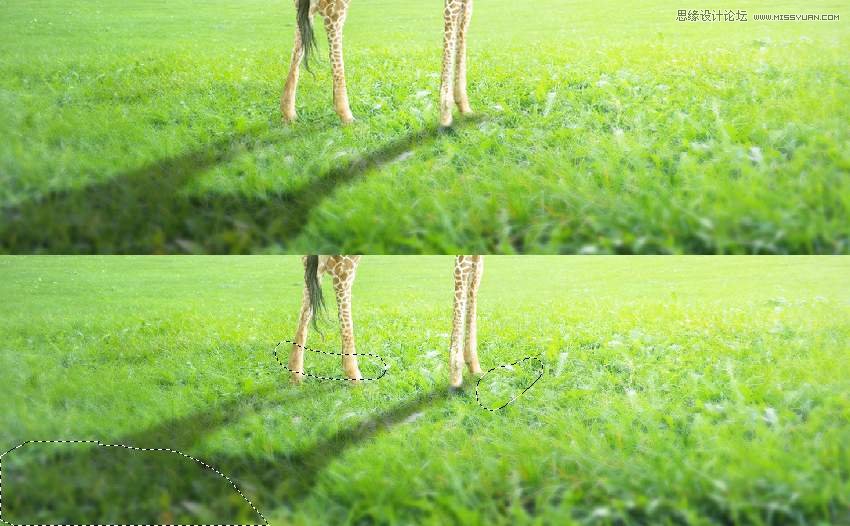
Lower the Opacity of the shadow to 40% and apply a Gaussian Blur of 6 px to this shadow layer. Use a layer mask to erase unwanted details of the shadow, and also reduce the visibility of the shadow on the top.
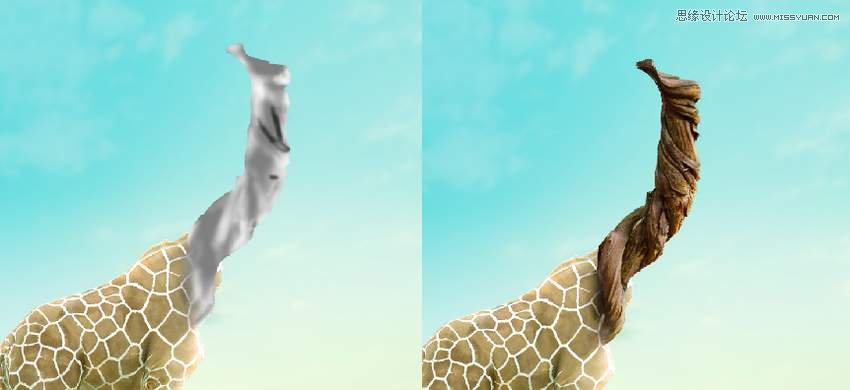
3. How to Create the Neck of a Tree
Step 1
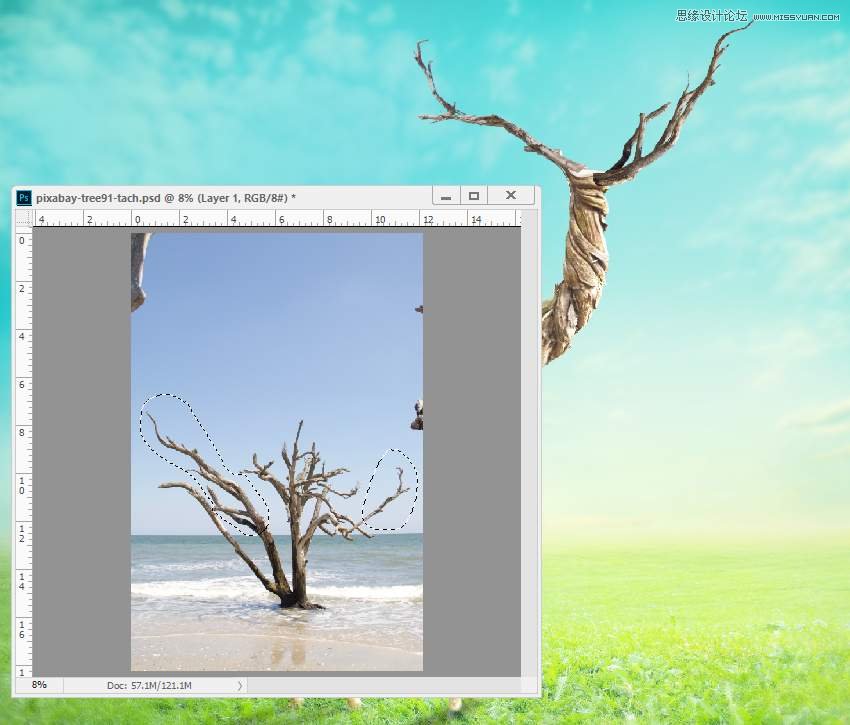
Open the tree 1 image and isolate the twisted tree from the background. Place it onto the neck of the giraffe and use Control-T with the Warp mode to bend it following the original form of the giraffe.
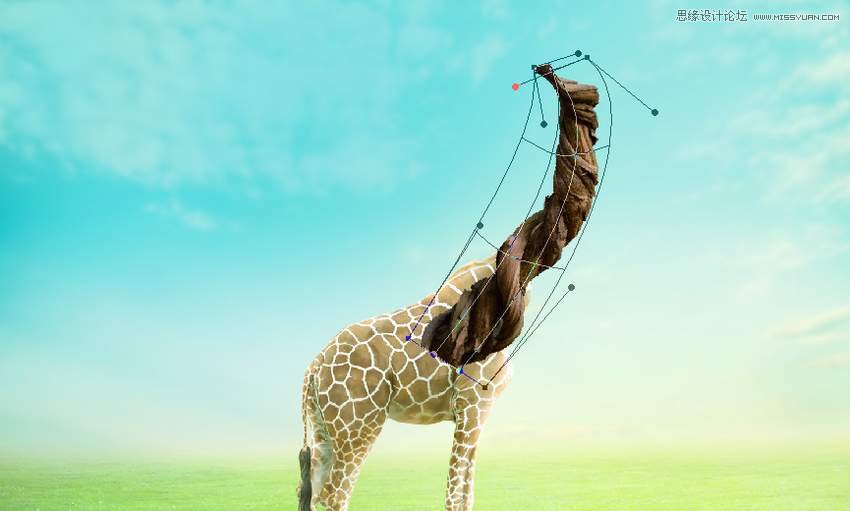
Add a mask to this layer and use a medium-soft black brush to blend the bottom of this tree part with the body of the giraffe. Lower the brush's opacity if needed to make the blended result look better and more natural.

Step 2
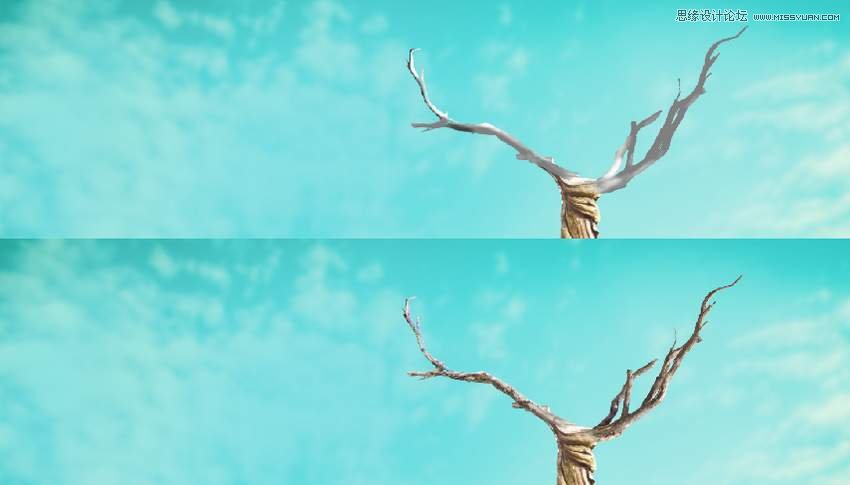
Make a new layer, change the mode to Overlay 100%, and fill with 50% gray. Use the Dodge and Burn Toolto refine the light and shadow on this twisted tree.
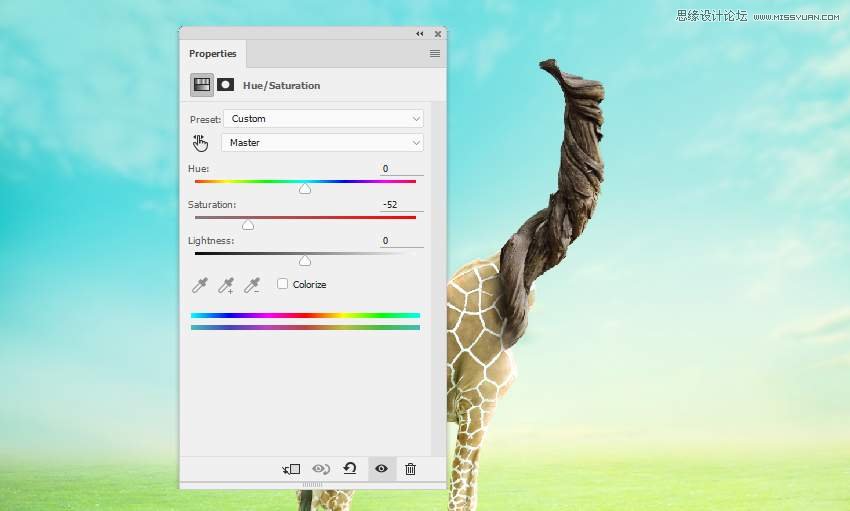
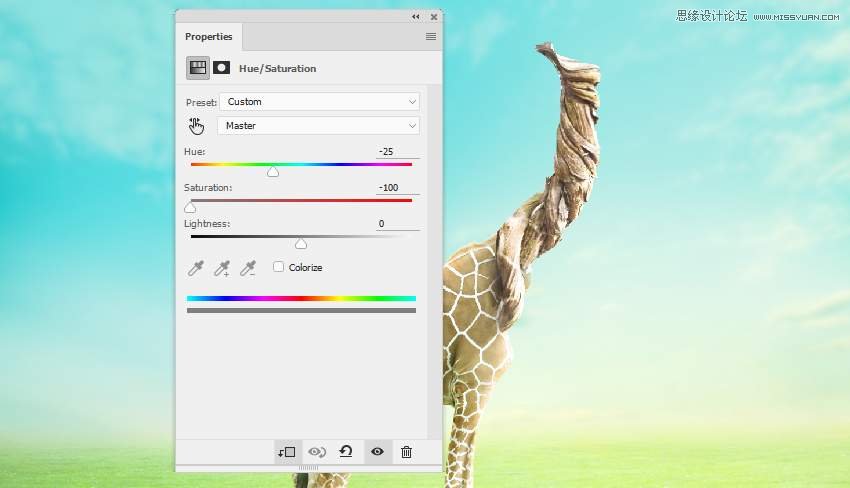
Step 3
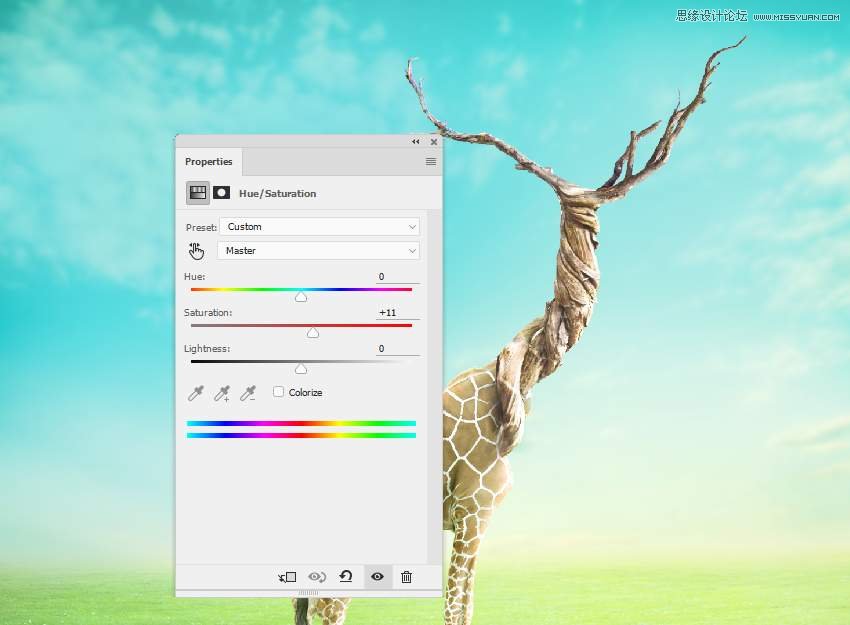
Create a Hue/Saturation adjustment layer to desaturate the tree. On the layer mask, use a soft black brush with a lowered Opacity (about 30-35%) to reveal some yellow on the tree.
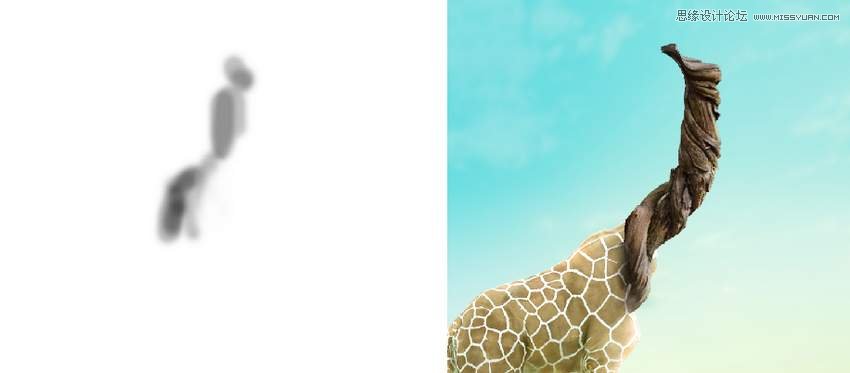
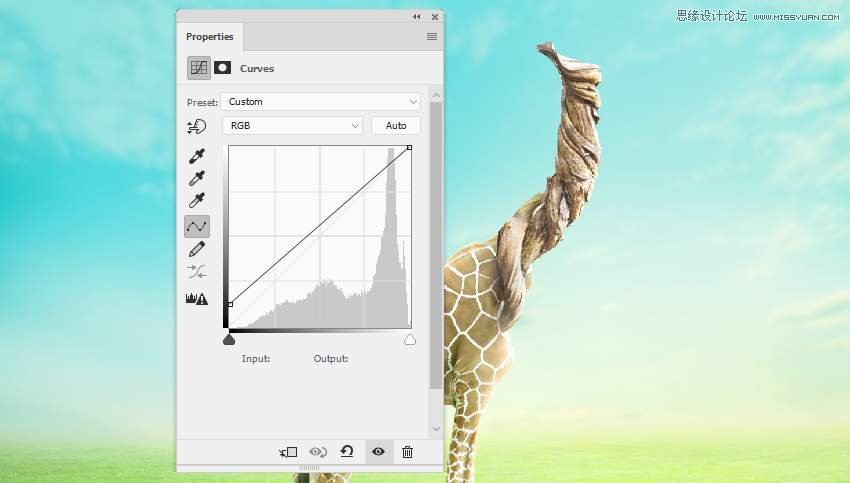
Step 4
Make a Curves adjustment layer to brighten the tree as it looks too dark now. Paint on the shadow areas to reduce the lightness there using this layer mask.
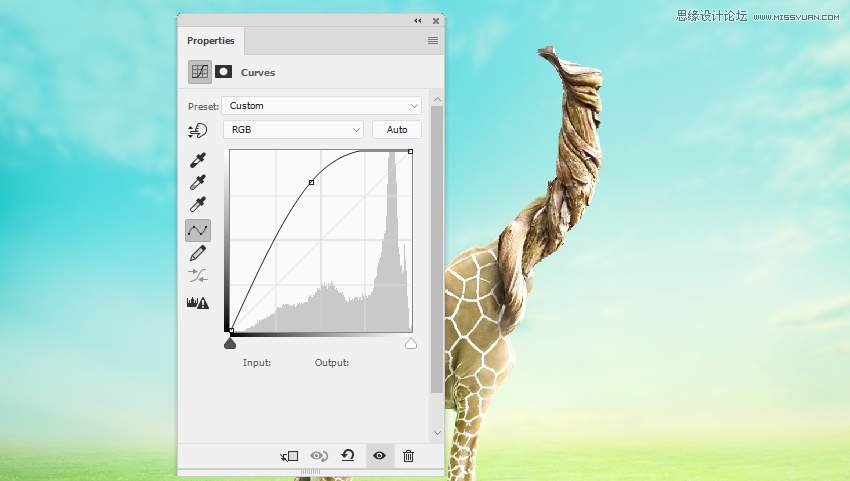
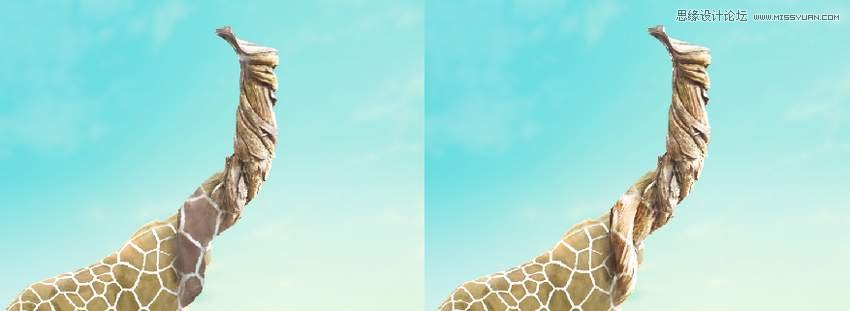
Step 5
Use another Curves adjustment layer to decrease the contrast of this tree part.
Step 6
Open the giraffe image again. Drag the isolated giraffe onto the existing giraffe, making him bigger than that one, and use Control-T to rotate this one a bit.

Add a mask to this layer and remove most of the big giraffe, leaving some skin texture visible only on the bottom of the tree neck. Change this layer mode to Overlay 100%.
Step 7
Make a Hue/Saturation adjustment layer to desaturate the skin texture.
4. How to Add the Branches
Step 1
Cut out the branches from the original image. Use the Lasso Tool (L) to select two branches on both sides and place them on the top of the neck.

Step 2
On each of the branch layers, create a new layer, change the mode to Overlay 100%, and fill with 100%gray. Use the Dodge and Burn Tool to enhance the light and shadow on the branches.
Step 3
Make a group for the branch layers and add a Hue/Saturation adjustment layer within this group. Increase the Saturation value a bit.
 ��ǵ���
-
 Photoshop�������L�������ƬЧ����Ӣ��2018-04-23
-
 Photoshop�ϳ��L����������L�i¹��Ӣ��2018-04-23
-
 Photoshop�ϳɱ�����Ч�Ľ��~������Ӣ��2018-02-10
-
 Photoshop�ϳɉ����L���ɭ�ֈ�����Ӣ��2018-02-10
-
 Photoshop�ϳ�����ʩ��������Ӣ��2018-02-10
-
 Photoshop���������|�е�3D���w�֡�Ӣ��2018-01-09
-
 Photoshop�OӋ����ȼ��ˇ�g�ֽ̡̳�Ӣ��2018-01-09
-
Photoshop�������L�������ƬЧ����Ӣ��
���P����11882018-04-23
-
Photoshop�ϳɱ�����Ч�Ľ��~������Ӣ��
���P����34052018-02-10
-
 Photoshop�����S���|�����w�֡�Ӣ��
���P����7422018-02-10
Photoshop�����S���|�����w�֡�Ӣ��
���P����7422018-02-10
-
 Photoshop�����@�G����3D���w��
���P����14682018-02-10
Photoshop�����@�G����3D���w��
���P����14682018-02-10
-
Photoshop�ϳɉ����L���ɭ�ֈ�����Ӣ��
���P����24492018-02-10
-
Photoshop�ϳ�����ʩ��������Ӣ��
���P����8372018-02-10
-
 Photoshop�������p���ع����w
���P����6532018-01-09
Photoshop�������p���ع����w
���P����6532018-01-09
-
 Photoshop����ľ�ذ�LOGO��ӡЧ����Ӣ��
���P����19272018-01-09
Photoshop����ľ�ذ�LOGO��ӡЧ����Ӣ��
���P����19272018-01-09
