Photoshop�ϳɱ�������ס��Ů����Ӣ��(3)
����Դ�� photoshoptutorials�����x���� ANTAKA NGUYEN �o�҂����������ʵ����£�Step 10
As you can see the Model’s base lightning is not really fit with our image. Normally it would take many adjustment layers to fix this but the result won’t be good. With this step I will show you this good trick to adjust the lightning as you want with the help of Dodge and Burn Tool.
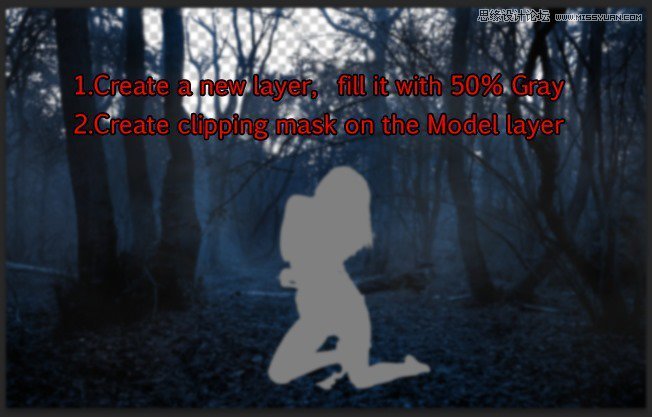
First you need to create a new layer and fill it with 50% Gray. Do so by hit Ctrl + A to select the layer, right click on the screen and choose Fill -> 50% Gray. Create Clipping Mask on the Model layer.
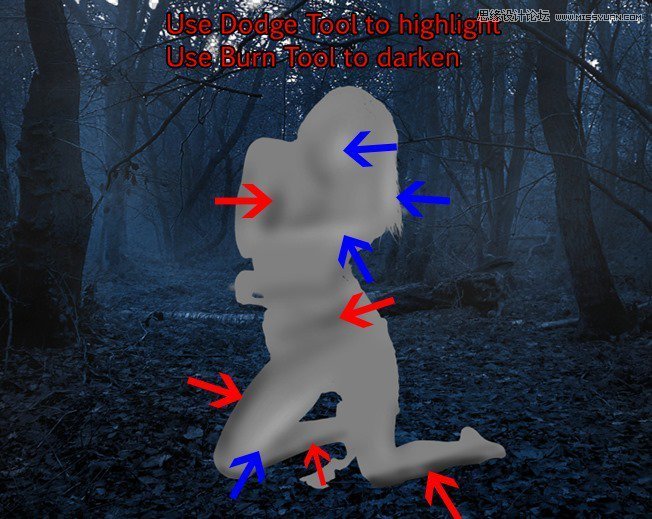
Grab the Dodge and Burn Tool, keep the setting as Midtone with 12% Exposure. Start painting on the model. Notice that the light source we will create later will come from the top so use the Dodge Tool to highlight the parts where the light sources will possibly touch the model, and Burn Tool to darken the other parts.
As in the image, red arrows indicate where to use Burn Tool, blue arrowsindicate where to use Dodge Tool.
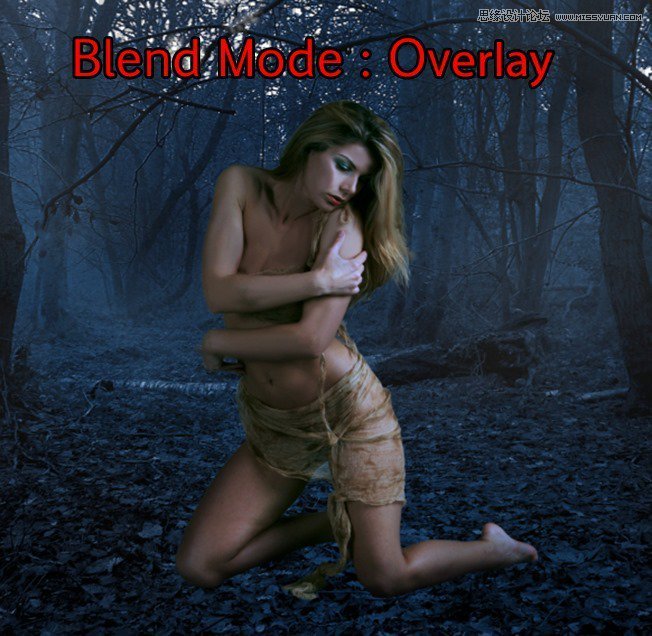
Change the Blend Mode to Overlay and see the result!
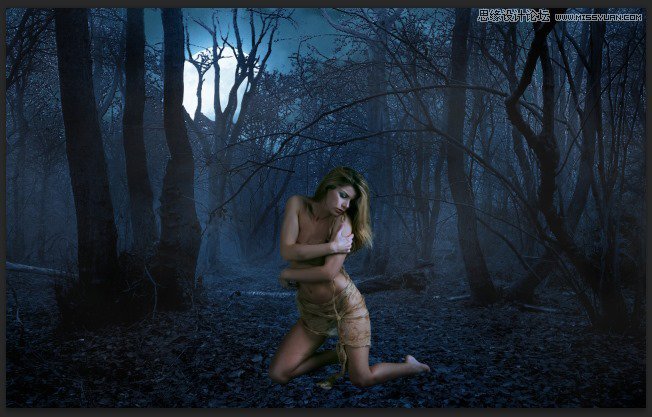
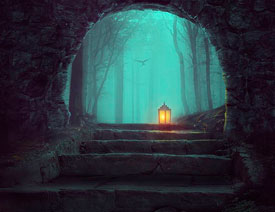
Step 11 – Adding The Sky
Place the Sky stock photo into our document, behind the forest.
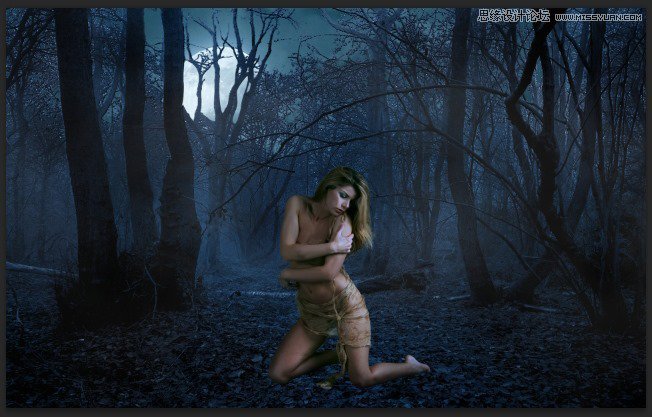
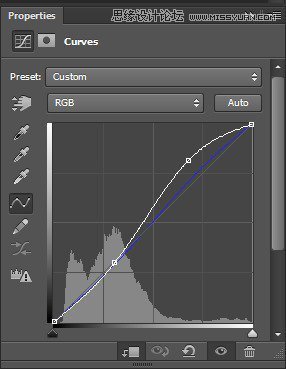
Add the Curves adjustment layer to the sky.
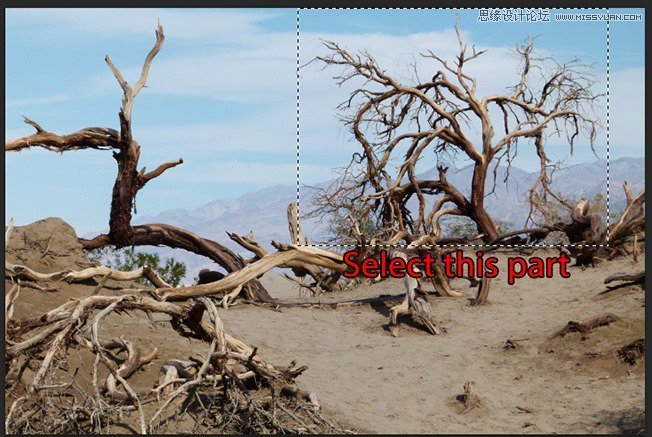
Step 12
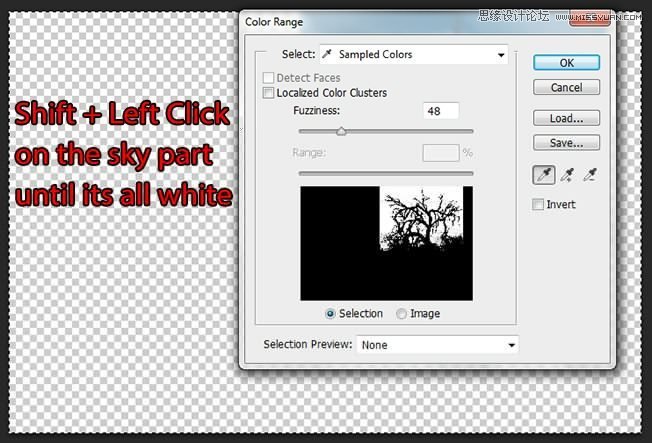
Open the Dead Tree 1 stock photo and select this specific part. Use Color Range to extract it as we did with the forest in step 2. This is a very good chance to try out this tool.
Step 13
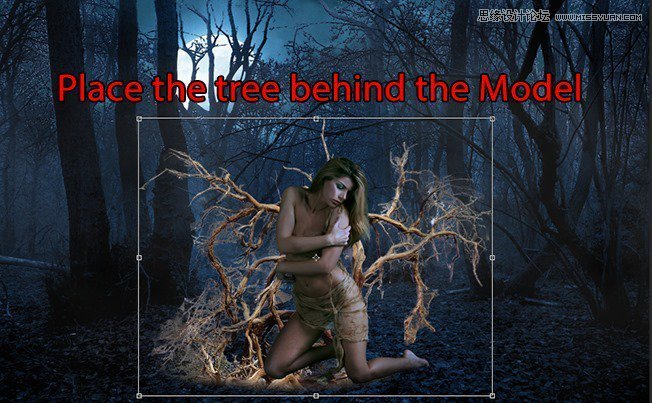
Place the extracted dead tree behind the model.
We don’t want those white pixels remain on the dead tree so we will seek the help of Refine Edge to get rid of these annoying thing. Select the dead tree by Ctrl + Left Click on its layer and hit Ctrl + Alt + R to open Refine Edge.
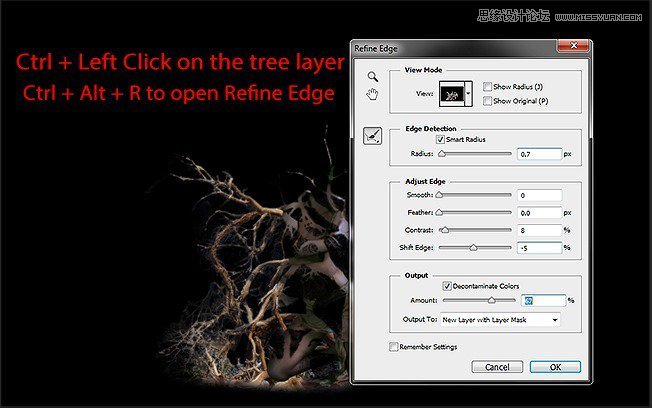
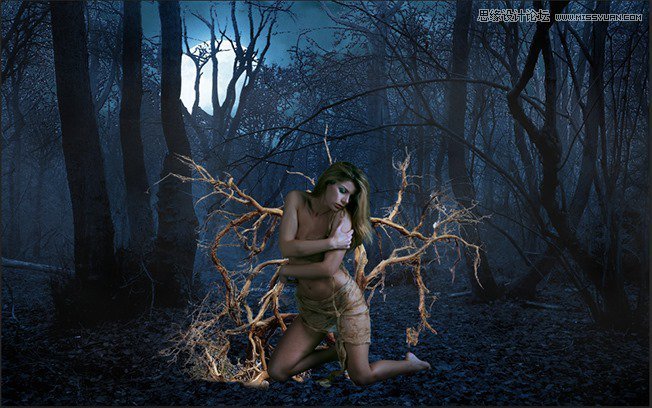
Just with a few tweaks, the white pixels are gone!
 ���㲻Ҫ��
-
 Photoshop�������L�������ƬЧ����Ӣ��2018-04-23
-
 Photoshop�ϳ��L����������L�i¹��Ӣ��2018-04-23
-
 Photoshop�ϳɱ�����Ч�Ľ��~������Ӣ��2018-02-10
-
 Photoshop�ϳɉ����L���ɭ�ֈ�����Ӣ��2018-02-10
-
 Photoshop�ϳ�����ʩ��������Ӣ��2018-02-10
-
 Photoshop���������|�е�3D���w�֡�Ӣ��2018-01-09
-
 Photoshop�OӋ����ȼ��ˇ�g�ֽ̡̳�Ӣ��2018-01-09
-
Photoshop�������L�������ƬЧ����Ӣ��
���P����11882018-04-23
-
Photoshop�ϳ��L����������L�i¹��Ӣ��
���P����13832018-04-23
-
Photoshop�ϳɱ�����Ч�Ľ��~������Ӣ��
���P����34052018-02-10
-
 Photoshop�����S���|�����w�֡�Ӣ��
���P����7422018-02-10
Photoshop�����S���|�����w�֡�Ӣ��
���P����7422018-02-10
-
 Photoshop�����@�G����3D���w��
���P����14682018-02-10
Photoshop�����@�G����3D���w��
���P����14682018-02-10
-
Photoshop�ϳɉ����L���ɭ�ֈ�����Ӣ��
���P����24492018-02-10
-
Photoshop�ϳ�����ʩ��������Ӣ��
���P����8372018-02-10
-
 Photoshop�������p���ع����w
���P����6532018-01-09
Photoshop�������p���ع����w
���P����6532018-01-09
