Photoshop�ϳɱ�������ס��Ů����Ӣ��
����Դ�� photoshoptutorials�����x���� ANTAKA NGUYEN �o�҂����������ʵ����£��̳�Դ�ļ����زģ�ɭ���б���ס��Ů������PS�̳��ز�
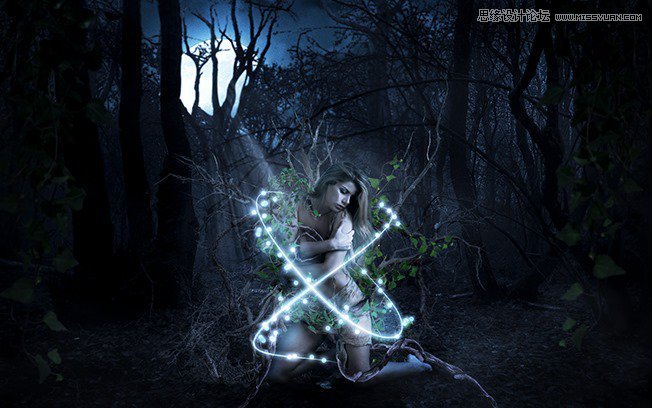
This tutorial will show you how to create a dark, mystic photo manipulation. Along the way you will learn some interesting tricks and techniques such as working with tree branches and ivies, advanced blending and coloring techniques. Lets get to it!
Preview of Final Results
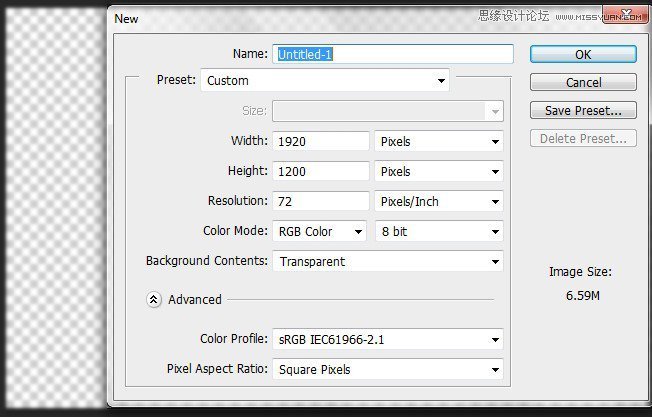
Step 1 – Create A New Document
Create a new document with the following attribute : Width 1920 – Height 1200| Background Contents : Transparent.
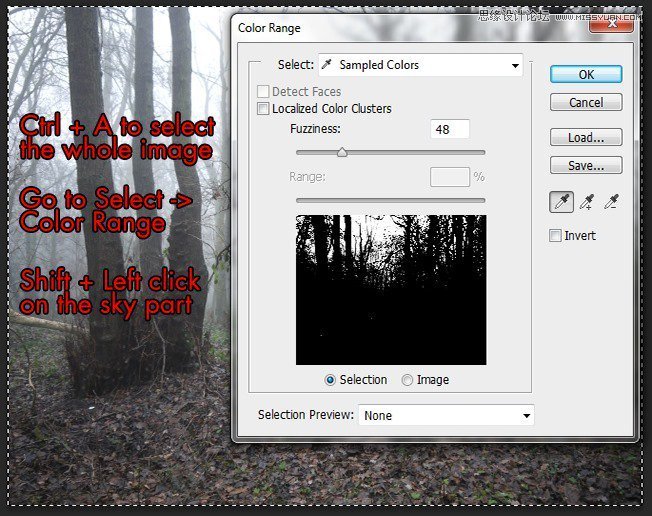
Step 2 – Extract The Forest
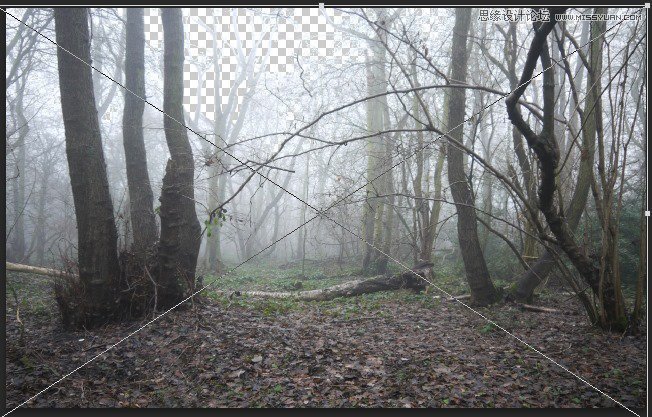
Open the Forest stock image. As you can see we want to create a mystic and dark piece so we can’t leave the bright sky like this, so we will get rid of it instead of trying to turn it dark. Select all the image with Ctrl + A then go to Select -> Color Range…
Hold Shift and left click on the sky part of the image until all the forest part are turned to black. You can adjust the Fuzziness for more accurate selection but I recommend keeping it below 80, as keeping high Fuzziness will cause Photoshop to select unnecessary part.
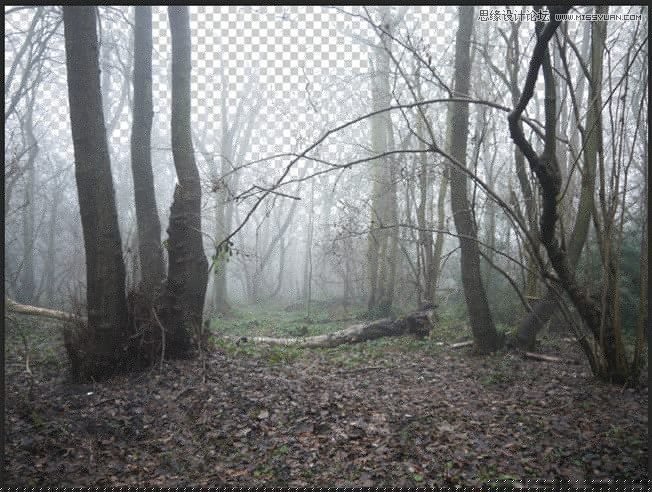
With the help of Color Range the forest has been extracted easily. This tool is a great choice for extracting detailed composition such as forest, trees, hair.
Step 3 – From Day to Night
Bring the extracted forest into our document. Resize it like the image below.
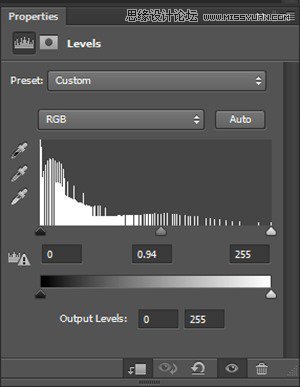
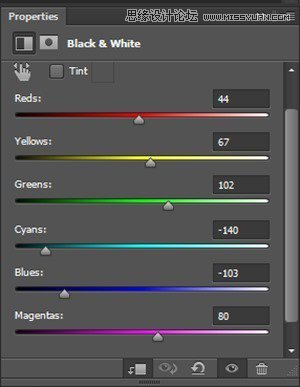
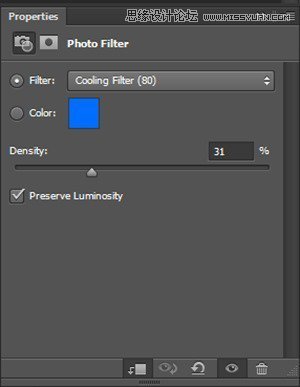
Begin adding this chain of Adjustment Layers to the forest. Remember to tick Create Clipping Mask on those adjustment layers so that they will only affect on the forest layer.
Brightness/Contrast -> Levels -> Black&White -> Photo Filter.

And here is the result :

Step 4
We need to add some extra shadow in order to fully turn our forest into a dark forest. Create a new layer, grab a soft brush with Black color and paint on these parts
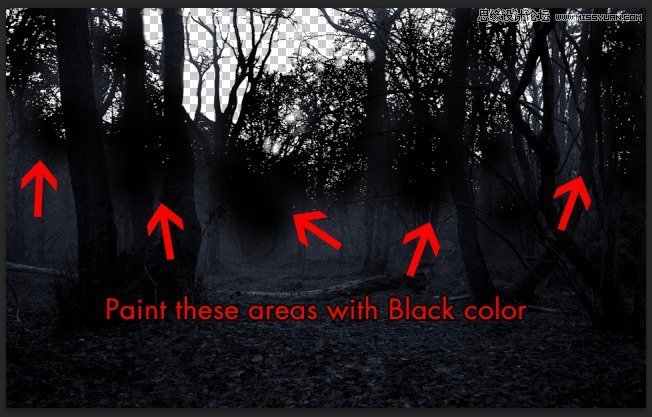
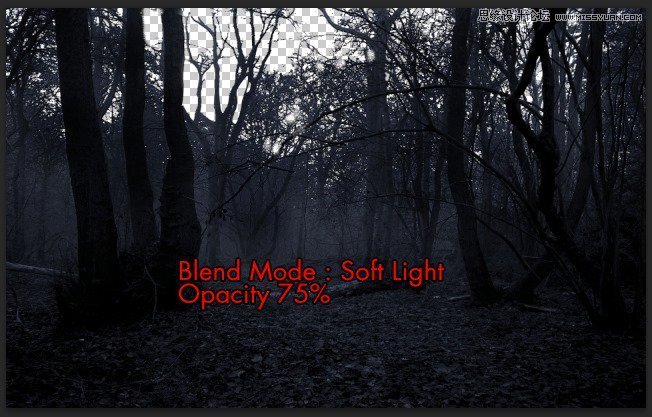
Switch the Blend Mode to Soft Light and low down the Opacity to 75%
Step 5
Dark blue is the main theme we want for our piece so we will begin to fill in the base color for the forest. Go to Layer -> New Fill Layer -> Solid Color then choose the color #4273b0, change the Blend Mode to Color with 77% Opacity, 78% Fill. By this simple step the forest will be blended with a nice dark blue color.
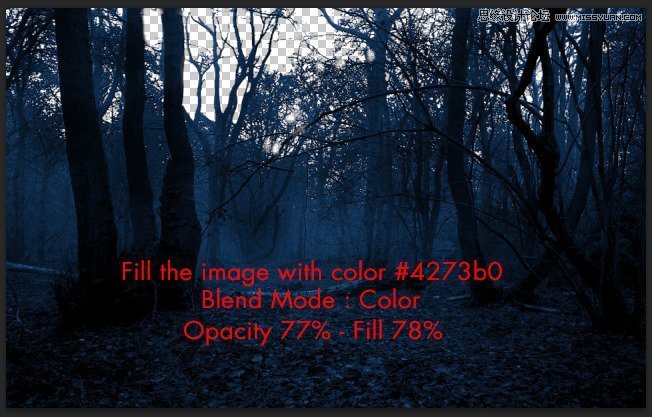
Add some Layer Mask to the Solid Color layer as some parts turned way too much blue than we needed.
 ���㲻Ҫ��
-
 Photoshop�������L�������ƬЧ����Ӣ��2018-04-23
-
 Photoshop�ϳ��L����������L�i¹��Ӣ��2018-04-23
-
 Photoshop�ϳɱ�����Ч�Ľ��~������Ӣ��2018-02-10
-
 Photoshop�ϳɉ����L���ɭ�ֈ�����Ӣ��2018-02-10
-
 Photoshop�ϳ�����ʩ��������Ӣ��2018-02-10
-
 Photoshop���������|�е�3D���w�֡�Ӣ��2018-01-09
-
 Photoshop�OӋ����ȼ��ˇ�g�ֽ̡̳�Ӣ��2018-01-09
-
Photoshop�������L�������ƬЧ����Ӣ��
���P����11882018-04-23
-
Photoshop�ϳ��L����������L�i¹��Ӣ��
���P����13832018-04-23
-
Photoshop�ϳɱ�����Ч�Ľ��~������Ӣ��
���P����34052018-02-10
-
 Photoshop�����S���|�����w�֡�Ӣ��
���P����7422018-02-10
Photoshop�����S���|�����w�֡�Ӣ��
���P����7422018-02-10
-
 Photoshop�����@�G����3D���w��
���P����14682018-02-10
Photoshop�����@�G����3D���w��
���P����14682018-02-10
-
Photoshop�ϳɉ����L���ɭ�ֈ�����Ӣ��
���P����24492018-02-10
-
Photoshop�ϳ�����ʩ��������Ӣ��
���P����8372018-02-10
-
 Photoshop�������p���ع����w
���P����6532018-01-09
Photoshop�������p���ع����w
���P����6532018-01-09
