Photoshop�ϳɳ��б����ǹ��������Ӣ��(5)
����Դ�� Photoshoptutorials�����x���� Jarka Hrnč��rko �o�҂����������ʵ����£�Step 15 – Darkening and Adding More Contrast
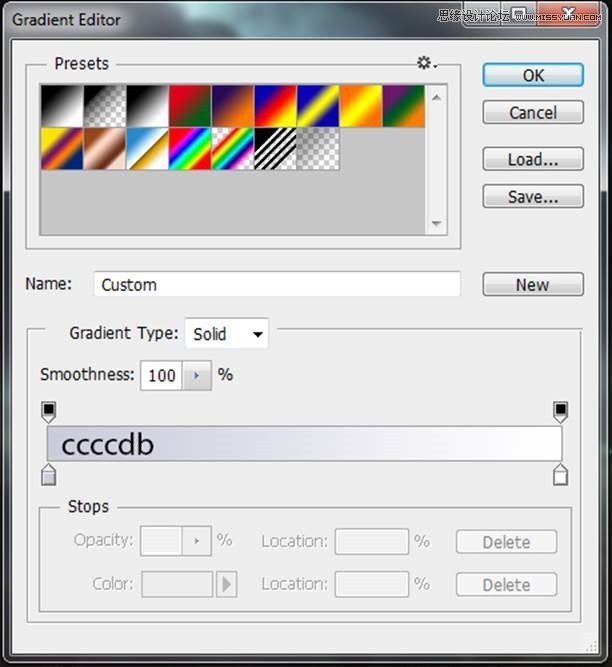
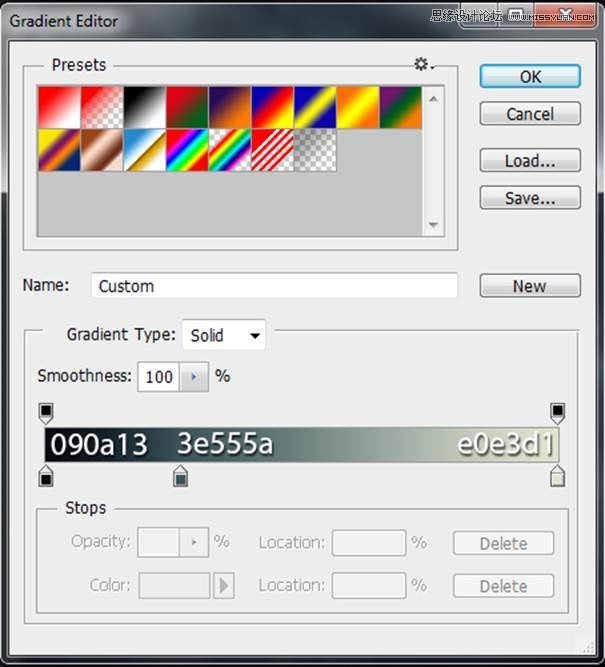
In this step you’ll make your photo manipulation bit more darker and contrasted. Let’s start with darkening. Add new adjustment layer Gradient Map and use same gradient as on the following image.
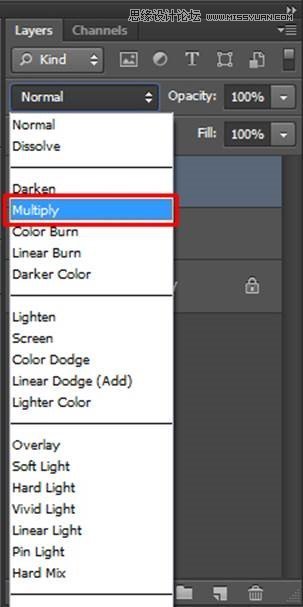
Change the Blending Mode of this layer from Normal to Multiply. This way you’ll not only make shadows darker but also add blue tones to them.
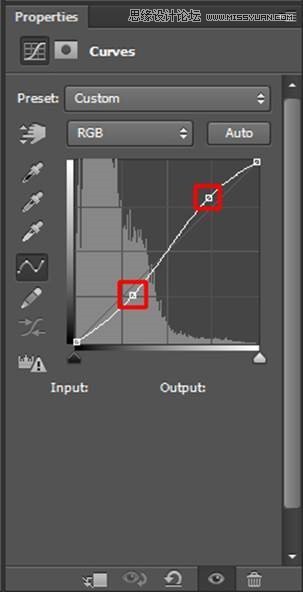
To increase contrast of your photo manipulation add new adjustment layer Curves and set the curve as on the following image.
Step 16 – Adding Light on the Skyscrapers
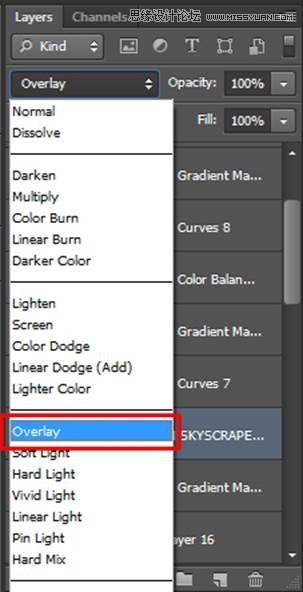
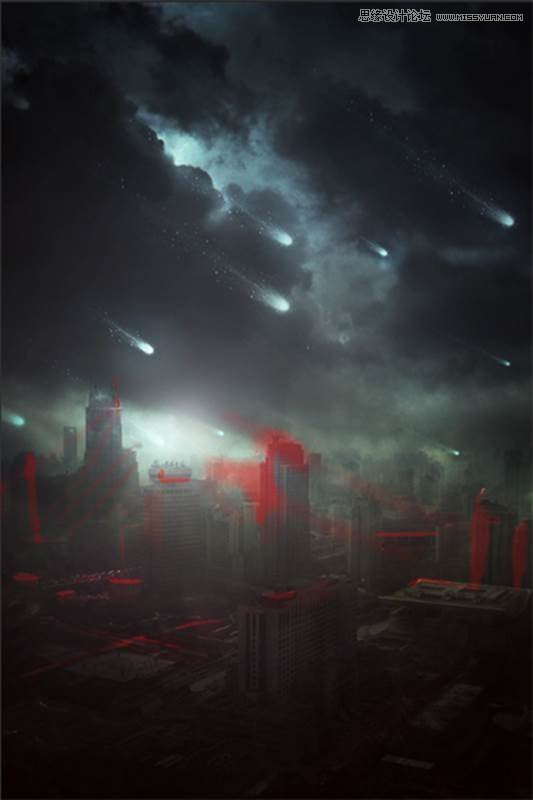
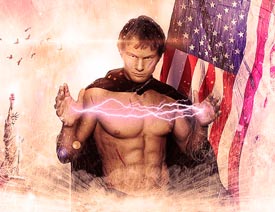
To make the image even more interesting and also realistic you need to add more light on those parts of the skyscrapers which are facing to the sun (=lens flare you’ve added in step 14). Add new empty layer on the top of all layers and name it LIGHT ON SKYSCRAPERS. Grab the Paint Bucket Tool (G) and fill the layer with mid grey color (#808080). To blend it properly with the rest of the image change its Blending Mode from Normal to Overlay.
Grab the Brush Tool (B). Select some soft round brush and lower its Opacity on about 20%. Pick white color and start painting over the areas where sun hits. On the following image you can see where you should paint. I highlighted it with red color. Take you time and build lighting slowly to get the most realistic result.
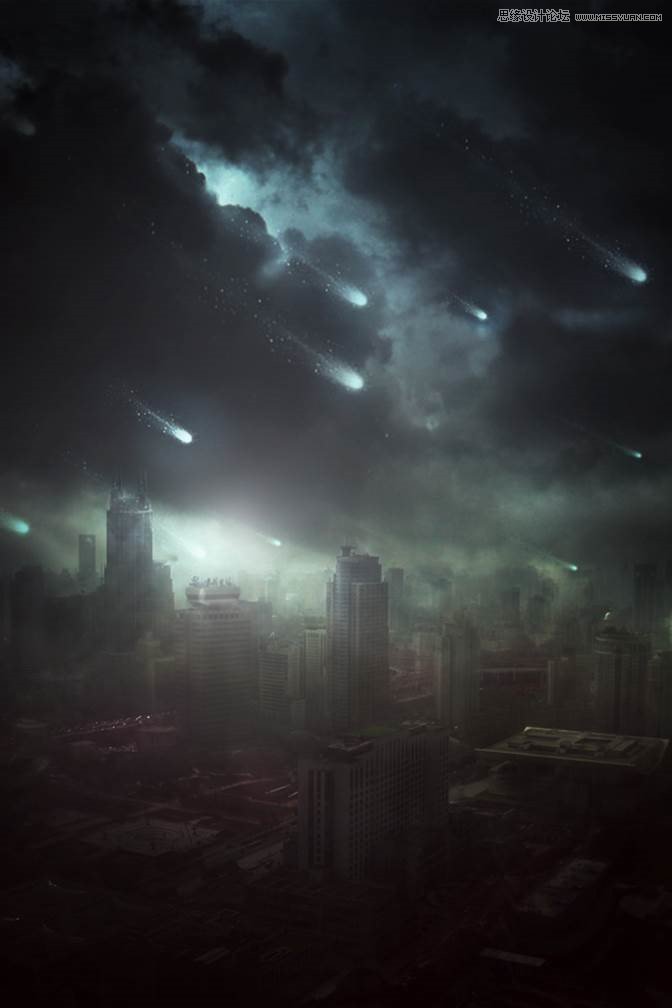
After this step your photo manipulation should look similar to the following picture.
Step 17 – More Contrast
From now on you’ll focus on color adjustments to create much stronger and sci-fi like atmosphere. Let’s start with increasing contrast of your photo manipulation even little bit more. Add new adjustment layer Curves and set the curve as on the following picture.
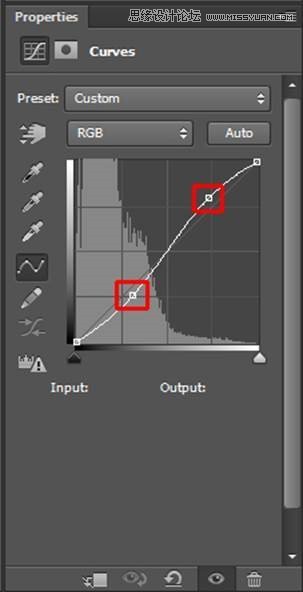
As you may notice it’s the same shape as when you increased contrast for the first time. This “S curve” is always used for increasing contrast. By moving the upper square you make light lighter and the down square makes dark tones darker. Depending on how far you move these two squares you increase contrast more or less. If you make reverse “S curve” you decrease contrast.
Step 18 – Bluer Tones I
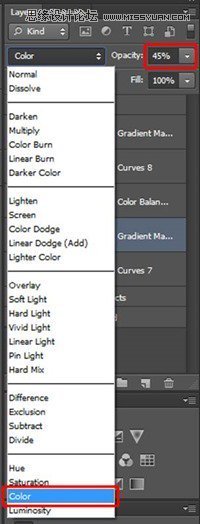
In this and following step you’ll make colors of the photo manipulation bluer. Add new adjustment layer Gradient Map on the top of all layers and set the gradient as on the following picture.
To blend it well with the rest of the image change Blending Mode of this layer from Normal to Color and lower its Opacity on 45%.
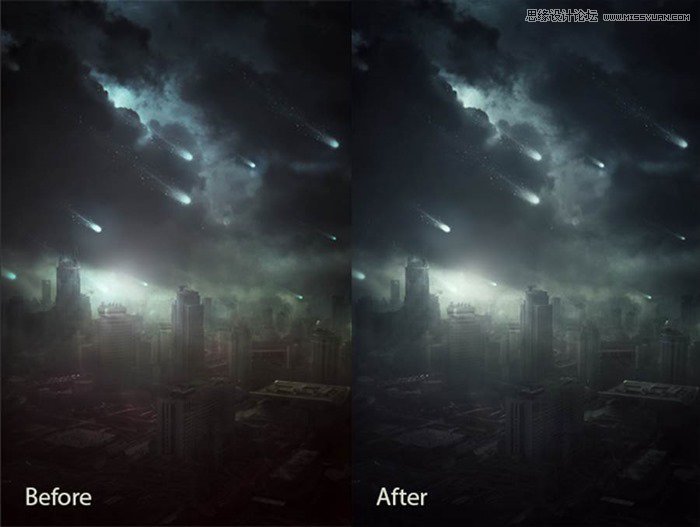
On the following image you can compare how the photo manipulation looks before and after this adjustment.
 ���㲻Ҫ��
-
 Photoshop�������L�������ƬЧ����Ӣ��2018-04-23
-
 Photoshop�ϳ��L����������L�i¹��Ӣ��2018-04-23
-
 Photoshop�ϳɱ�����Ч�Ľ��~������Ӣ��2018-02-10
-
 Photoshop�ϳɉ����L���ɭ�ֈ�����Ӣ��2018-02-10
-
 Photoshop�ϳ�����ʩ��������Ӣ��2018-02-10
-
 Photoshop���������|�е�3D���w�֡�Ӣ��2018-01-09
-
 Photoshop�OӋ����ȼ��ˇ�g�ֽ̡̳�Ӣ��2018-01-09
-
Photoshop�ϳɱ�����Ч�Ľ��~������Ӣ��
���P����34052018-02-10
-
Photoshop�ϳɉ����L���ɭ�ֈ�����Ӣ��
���P����24492018-02-10
-
 Photoshop�ϳɄ����Ӣ�ۑ����̡̳�Ӣ��
���P����5802017-12-12
Photoshop�ϳɄ����Ӣ�ۑ����̡̳�Ӣ��
���P����5802017-12-12
