Photoshop�ϳɄ����Ӣ�ۑ����̡̳�Ӣ��(4)
����Դ�� photoshoptutorials�����x���� photoshoptutorials �o�҂����������ʵ����£�Step 29
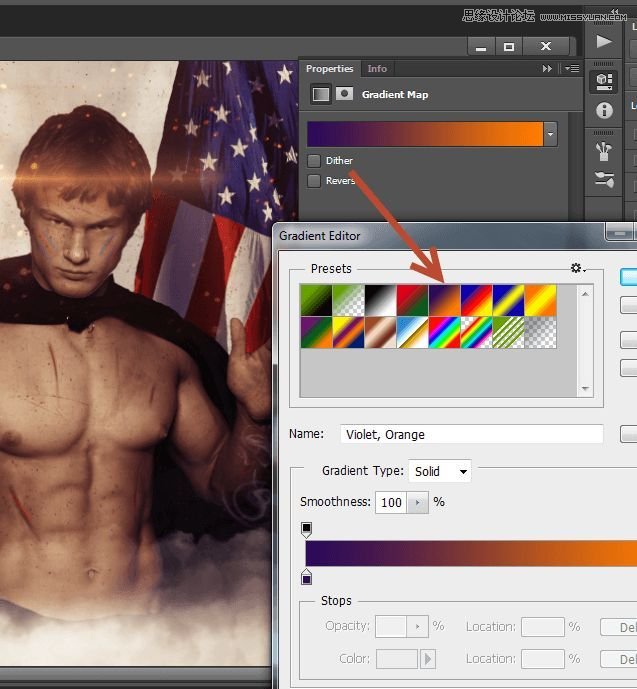
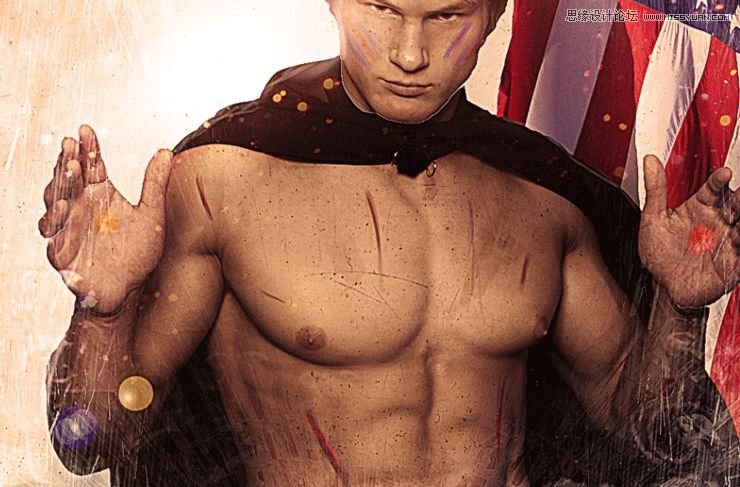
Create a Gradient Map adjustment layer (Layer > Adjustment Layers > Gradient Map) and use the settings shown below. Change the blending mode of the gradient layer to Soft Light and lower the Opacity to 59%.
Step 30
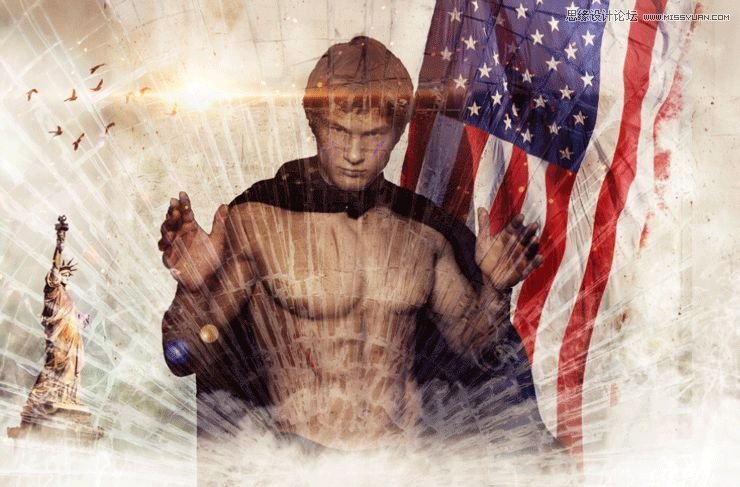
Open resource “Broken Glass”. Copy all and paste into our working document. Change the blend mode to Soft Light and convert it to a smart object.
Step 31
Add a layer mask to the broken glass layer and mask away most of the upper areal leaving only the lower areas visible.
Step 32
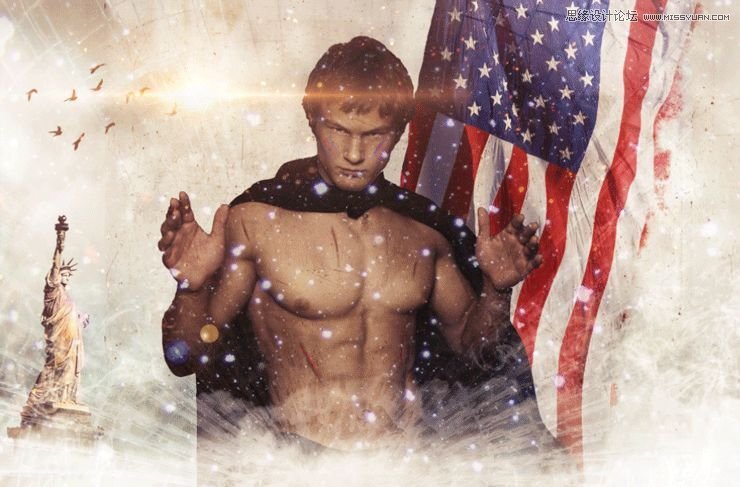
Open resource “Snow”. Copy all and paste into our document. Change the blending mode to Screen. Lower the opacity to 72%.
Step 33
Add a layer mask and hide away the snow that falls on our guy.

Step 34
Import the rain brush. Create a new layer and create some white rain using one of the brushes. Add a layer mask and again mask the rain that falls over the guy.

Step 35
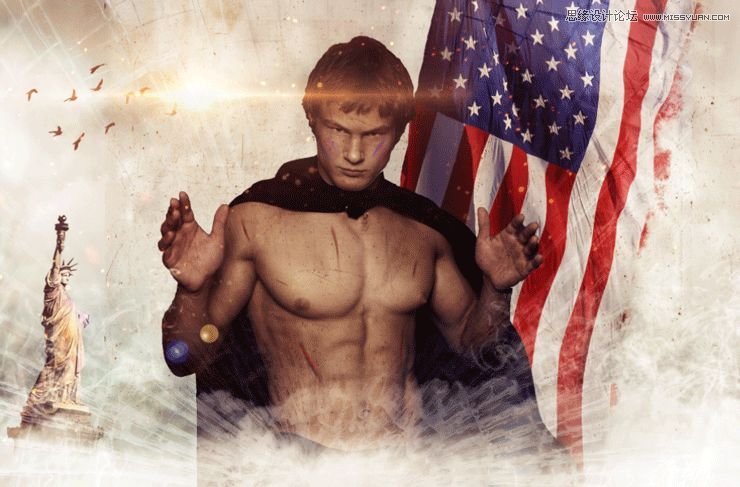
Create a new layer and choose a deep blue color (#2f35b0). Change the layer blend mode to Overlay and paste with deep blue color over the right side of the flag. With magenta (#c691c4) paint over the left side of the document.
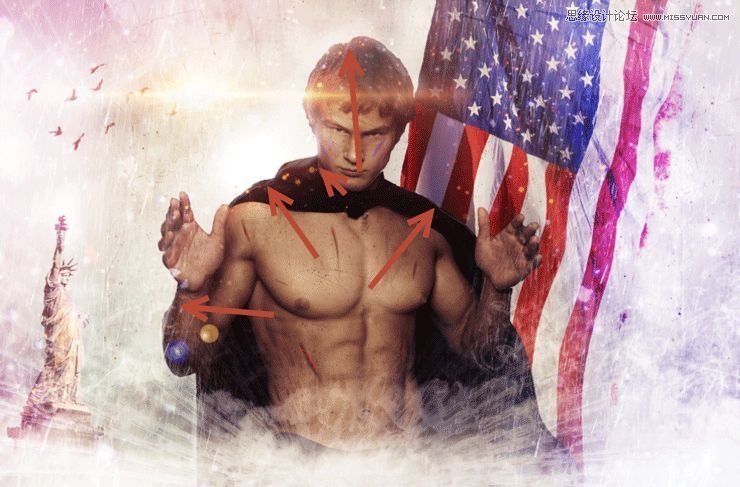
Step 36
Create a new layer and change the layer blending mode to Overlay. With a round soft brush at 33% Opacity paint with white in the indicated areas in order to put focus on them.

Step 37
Create a new layer and change the blending mode to Overlay. Choose the standard chalk brush and lower the size to 2 pixels. Lower the opacity to 30% and paint a contour over our guy.
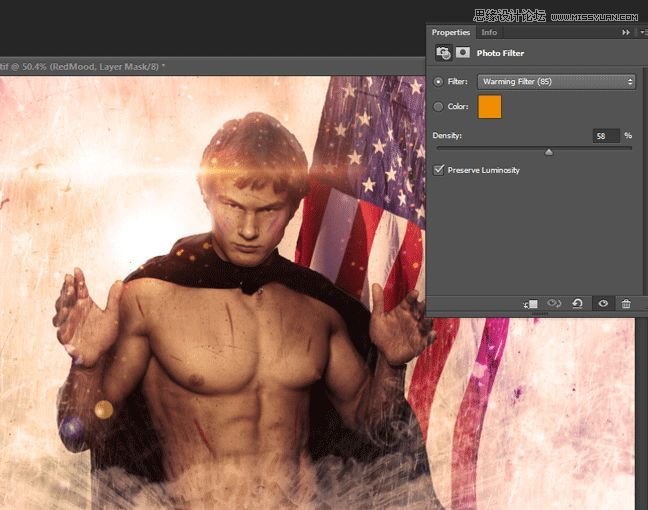
Step 38
Create a Photo Filter adjustment layer by going to Layer > New Adjustment Layer > Photo Filter. From the presets choose Warming Filter 85 and increase the Density to 58%.
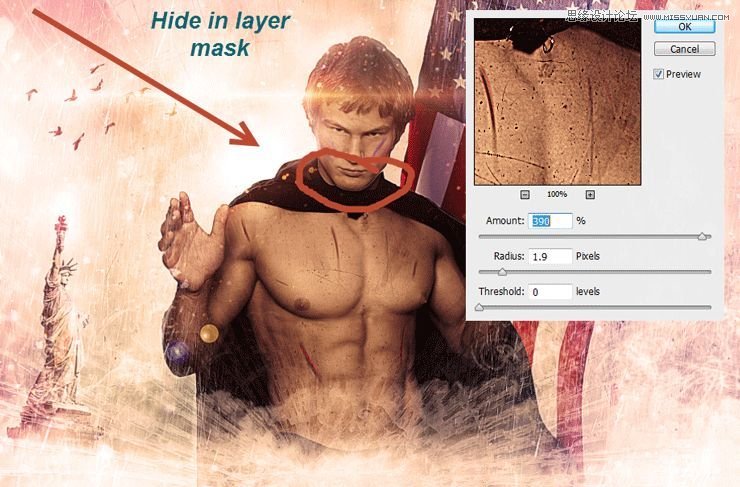
Step 39
Create a new layer from all the other layers. Apply a Unsharp Mask filter (Filter > Sharpen > Unsharp Mask) with the settings shown below. Add a layer mask and hide the indicated area.
Step 40
Create a new layer. Sample a red color from the flag (alt-click with the brush tool selected to sample a color) and paint two red dots on each hand symbolizing wounds. Change the blending mode of the layer to Overlay.
 ���㲻Ҫ��
-
 Photoshop�������L�������ƬЧ����Ӣ��2018-04-23
-
 Photoshop�ϳ��L����������L�i¹��Ӣ��2018-04-23
-
 Photoshop�ϳɱ�����Ч�Ľ��~������Ӣ��2018-02-10
-
 Photoshop�ϳɉ����L���ɭ�ֈ�����Ӣ��2018-02-10
-
 Photoshop�ϳ�����ʩ��������Ӣ��2018-02-10
-
 Photoshop���������|�е�3D���w�֡�Ӣ��2018-01-09
-
 Photoshop�OӋ����ȼ��ˇ�g�ֽ̡̳�Ӣ��2018-01-09
-
Photoshop�ϳɱ�����Ч�Ľ��~������Ӣ��
���P����34052018-02-10
-
Photoshop�ϳɉ����L���ɭ�ֈ�����Ӣ��
���P����24492018-02-10
-
Photoshop�OӋ����ȼ��ˇ�g�ֽ̡̳�Ӣ��
���P����7612018-01-09
-
 Photoshop�ϳɳ��б����ǹ��������Ӣ��
���P����7142017-12-12
Photoshop�ϳɳ��б����ǹ��������Ӣ��
���P����7142017-12-12
